Why DIY Espresso Powder is a Game Changer for Bakers
For home bakers and culinary enthusiasts alike, discovering a secret ingredient that elevates creations from good to extraordinary is always a thrill. Enter espresso powder recipe – a humble yet mighty component often overlooked, but cherished by professional bakers worldwide. This finely ground, concentrated form of dark-roasted coffee beans isn't just for coffee lovers; it's a culinary marvel that intensifies flavors, especially chocolate, without imparting a distinct coffee taste.
Imagine serving a chocolate cake so rich, so deeply flavored, that it becomes the talk of every gathering. Or perhaps brownies with a fudginess that melts in your mouth, leaving a profound cocoa experience. The magic behind these moments often lies in a tiny dash of espresso powder. While readily available in specialty stores and online, mastering the espresso powder recipe at home offers a level of satisfaction, control, and freshness that store-bought versions often can't match. It's an economical choice too, leveraging simple ingredients and tools you might already have in your kitchen.
This isn't just about saving a few dollars; it's about embarking on a journey of culinary self-sufficiency and ensuring you always have this powerful flavor enhancer on hand. Whether you're a seasoned baker or just starting, this guide will empower you to create your own supply of this essential ingredient, transforming your baked goods with remarkable ease and depth.
Unveiling the Simple Espresso Powder Recipe: What You'll Need
Crafting your own espresso powder is surprisingly straightforward, requiring just a few key items. The beauty of this espresso powder recipe lies in its simplicity, making it accessible for any home baker.
The Star Ingredient: Espresso Beans
- Quality Matters: The foundation of exceptional espresso powder begins with the beans. While any dark-roasted coffee bean labeled "espresso" will work, opting for high-quality, whole espresso beans will yield the most flavorful powder.
- Organic & Medium Roast: Many bakers prefer organic, medium-roast espresso beans. The medium roast provides a balanced flavor profile that won't overpower your baked goods. Look for locally roasted beans from a farmer's market or specialty coffee shop for optimal freshness.
- Accessibility: If specialty beans aren't readily available, don't fret. Your local grocery store likely carries several reputable brands of espresso beans. The key is to choose whole beans rather than pre-ground coffee, as grinding them yourself ensures maximum potency.
- Avoid Instant Coffee: It’s crucial to distinguish espresso powder from instant espresso or instant coffee. While similar in appearance, instant products are already brewed and dehydrated, lacking the intense, concentrated flavor of finely ground roasted beans. For our homemade espresso powder recipe, whole espresso beans are non-negotiable.
Essential Tools for the Task
- Baking Sheet: A good quality, rimmed baking sheet is indispensable. A half-sheet pan with rims is ideal, as it promotes even heat distribution in the oven and prevents the beans from rolling off. Having two on hand can be useful for various baking tasks. Look for heavy-gauge aluminum sheets for consistent performance.
- Coffee or Spice Grinder: This is where the magic happens. A dedicated coffee or spice grinder is highly recommended for achieving the ultra-fine consistency required for espresso powder.
- Burr Grinders: If you're a coffee enthusiast with a burr-style conical grinder, it's perfect for the job. Burr grinders produce a uniform grind, which is crucial for consistent flavor extraction and a smooth powder.
- Blade Grinders: A more common and inexpensive blade grinder can also work effectively. For best results, grind in short pulses to prevent overheating the beans and to ensure an even grind. Some bakers opt for a dedicated inexpensive grinder solely for spices and espresso powder to avoid flavor transfer with their regular coffee.
- Consistency is Key: The goal is a powder as fine as cocoa powder or confectioners' sugar. Any coarser grind might leave an unwanted gritty texture in your delicate baked goods.
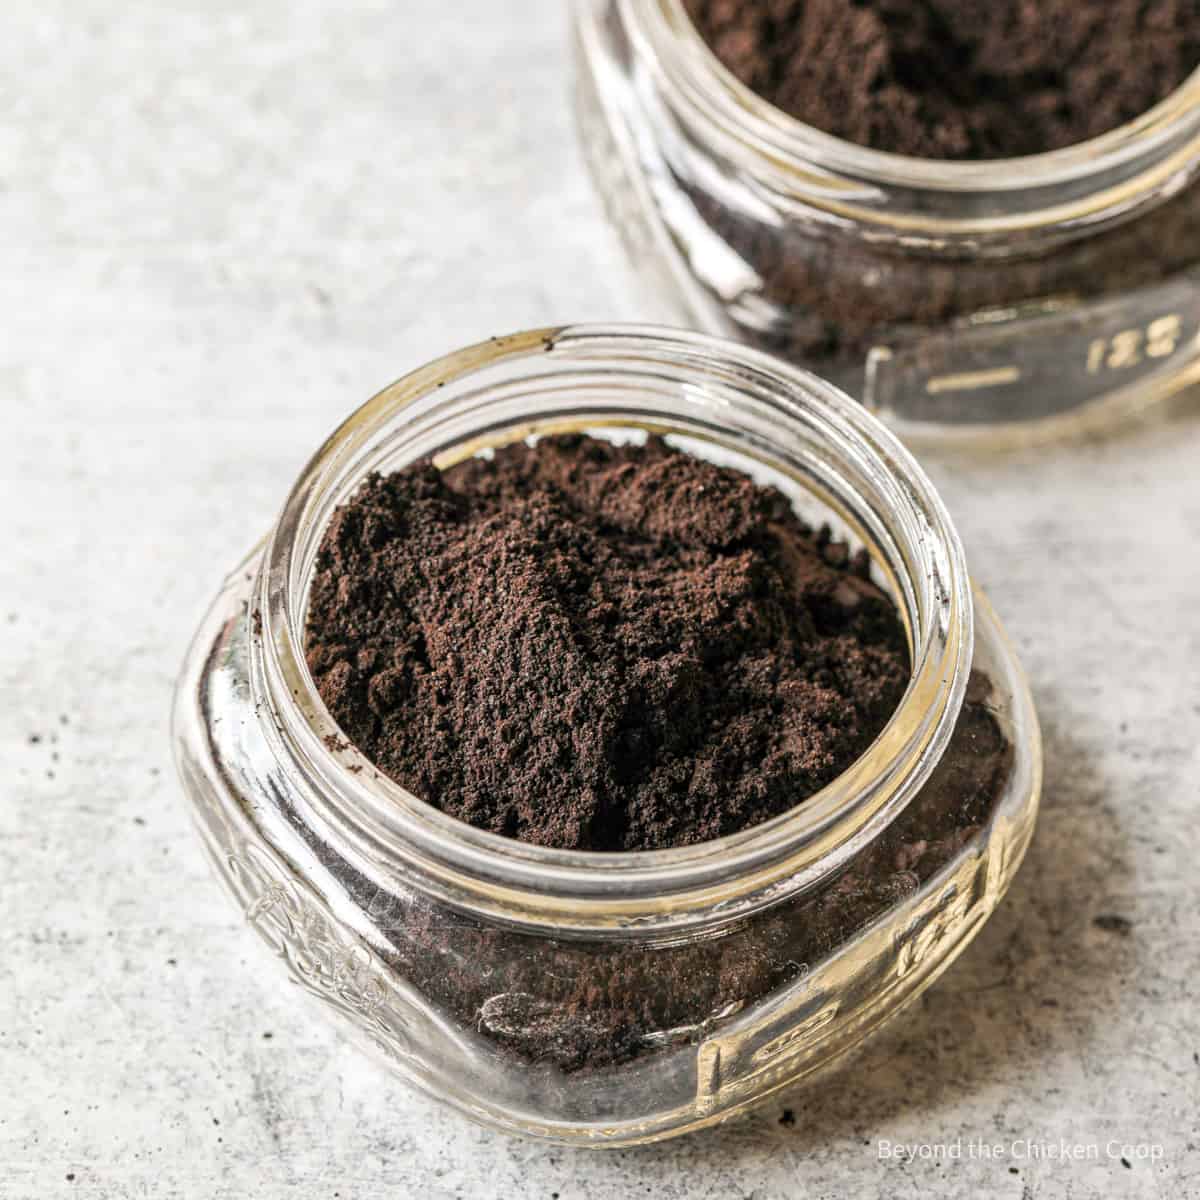
- Airtight Spice Container: Once your espresso powder is made, proper storage is paramount. An airtight container – preferably dark glass or opaque plastic – will protect your powder from light, air, and moisture, preserving its potent flavor and aroma for longer. A small canning jar or a repurposed spice jar works perfectly.
Step-by-Step Guide to Making Your Own Espresso Powder
Now that you have your ingredients and tools ready, let's dive into the simple process of making your very own espresso powder. Follow these steps for a perfect batch every time.
Step 1: Toasting Your Espresso Beans
- Preheat Oven: Preheat your oven to a low temperature, typically around 250-275°F (120-135°C). The aim is to gently toast the beans, not roast them further.
- Spread Beans Evenly: Arrange your whole espresso beans in a single layer on your rimmed baking sheet. Ensure they are not crowded, allowing for even heat exposure.
- Gentle Toasting: Place the baking sheet in the preheated oven. Toast the beans for approximately 10-15 minutes. The exact time may vary based on your oven and the beans' initial roast.
- Cool Completely: Once toasted, remove the beans from the oven and let them cool completely on the baking sheet at room temperature. This step is crucial; attempting to grind warm beans can result in a clumpy, less fine powder and may damage your grinder. As they cool, the beans will become more brittle, making them easier to grind to a fine consistency.
Step 2: Grinding to Perfection
- Grind in Batches: Depending on the size of your grinder, you may need to grind the toasted and cooled beans in small batches. Overfilling the grinder can lead to an uneven grind.
- Pulse and Check: Place a small amount of beans into your coffee or spice grinder. Begin to pulse the grinder in short bursts (5-10 seconds), shaking the grinder occasionally between pulses to redistribute the beans. This technique helps achieve a more uniform grind.
- Achieve Fine Consistency: Continue grinding until the beans are transformed into an ultra-fine powder, resembling cocoa powder or confectioners' sugar. There should be no visible coarse granules. You might need to grind for a minute or two, depending on your grinder's power. If you rub a pinch between your fingers, it should feel smooth, not gritty.
- Sift (Optional but Recommended): For the absolute finest powder, you can sift the ground espresso through a fine-mesh sieve. Any larger particles that remain can be returned to the grinder for another pass. This extra step ensures a truly seamless integration into your baked goods.
Step 3: Storing for Lasting Freshness
- Transfer Immediately: Once ground to perfection, immediately transfer your homemade espresso powder to an airtight spice container. Minimize its exposure to air.
- Cool, Dark Place: Store the container in a cool, dark pantry or cupboard, away from direct sunlight and heat.
- Shelf Life: Stored correctly, homemade espresso powder can retain its potency and flavor for up to 3-6 months. While it won't spoil, its flavor will gradually diminish over time. Making smaller, more frequent batches ensures you always have the freshest powder available.
Beyond Chocolate: Creative Ways to Use Your Homemade Espresso Powder
The primary use for espresso powder is, undoubtedly, to enhance chocolate. A tiny amount works wonders, deepening the cocoa notes in cakes, brownies, cookies, and even hot chocolate, making them taste richer and more complex. For an in-depth look at this synergy, explore Espresso Powder: The Secret to Intensify Chocolate Baking.
However, the versatility of this homemade ingredient extends far beyond the realm of chocolate. Don't be afraid to experiment!
- Non-Chocolate Desserts:
- Spice Cakes & Gingerbread: A pinch can add depth to the warm spices in carrot cake, gingerbread, or pumpkin pie.
- Caramel & Toffee: Stir a tiny amount into homemade caramel sauce or toffee for a sophisticated, slightly bitter edge that balances sweetness.
- Frostings & Glazes: Incorporate it into vanilla buttercream, cream cheese frosting, or even a simple glaze for donuts or pastries to add a subtle complexity.
- Tiramisu & Coffee-Flavored Desserts: Naturally, it's a star in tiramisu, but also consider adding it to coffee ice cream, panna cotta, or mocha-flavored mousses.
- Savory Applications:
- Rubs for Meat: Mix espresso powder into dry rubs for steak, ribs, or chicken. Its deep, earthy notes pair wonderfully with savory spices, creating a fantastic crust.
- Chili & Stews: A teaspoon added to chili, beef stew, or even a rich tomato sauce can deepen the umami flavor and create a more robust profile.
- Marinades: Incorporate it into marinades for red meats to tenderize and impart a unique, rich flavor.
- Beverages:
- Smoothies: Add a quarter teaspoon to your morning smoothie for an unexpected boost of flavor and a touch of sophistication.
- Coffee Drinks: While it's derived from espresso, adding a tiny sprinkle to your regular cup of coffee can enhance its body and depth.
Remember, a little goes a long way. Start with a small amount (1/4 to 1/2 teaspoon for most recipes) and adjust to your taste. The goal is to enhance, not overpower.
Conclusion
Creating your own espresso powder at home is a rewarding endeavor that grants you control over ingredients, ensures maximum freshness, and unlocks a new level of flavor in your culinary creations. This simple espresso powder recipe, from toasting the beans to grinding them to a perfect fineness, is a small effort with a huge payoff. From intensifying the deep chocolate notes in your favorite desserts to adding a mysterious depth to savory dishes, homemade espresso powder will quickly become one of your most treasured secret ingredients. So, gather your beans and your grinder, and prepare to elevate your baking to professional heights with this easy-to-make, incredibly versatile powder!
